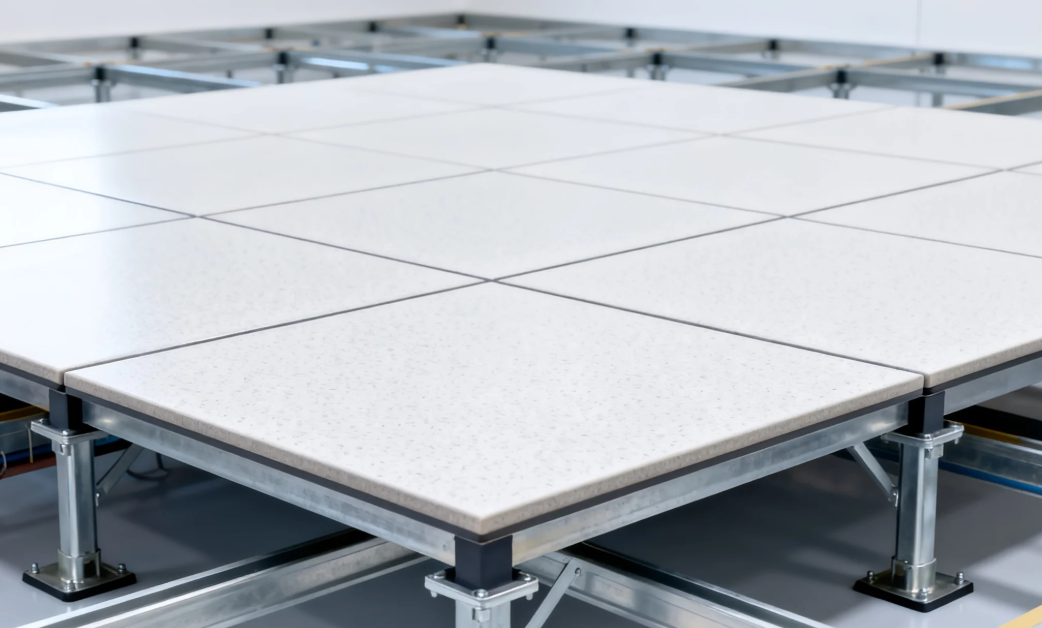

In a low-voltage equipment room, anti-static floors serve as the 'guardian' to protect the equipment. Many beginners think the installation is complicated, but mastering the core steps is actually very simple. First, remember: a conventional anti-static floor system relies on these three 'brothers' – the floor panels, beams, and supports. The beams and height-adjustable supports are fixed together with screws to form a base, and the floor panels are then inserted into the square grids formed by the beams. The following 'five-step' guide is easy for beginners to grasp.
Step 1: Prepare the "foundation". Thoroughly clean the surface of the structural layer, removing all dust and debris. Next, level it carefully, using a spirit level to ensure that the flatness meets standard tolerances – this is key for the stability of subsequent installation, just like laying a solid foundation for a house.
Step 2: Apply the "protective coat". Spray anti-static floor paint evenly on the leveled floor, making sure there are no missed spots. This layer enhances the floor's insulation and connects to the subsequent anti-static layers, making static protection more continuous.
Step 3: Lay the "conductive grid". Install an anti-static leakage grid made of copper strips or copper foil, setting the spacing of the copper strips according to regulations and ensuring that the junctions are firmly connected. It acts as a 'conduit' for static electricity, safely channeling static out to prevent equipment damage.
Step 4: Set up the "support frame". Adjust the supports according to the room height, then screw the beams to the supports to form square frame grids. During installation, ensure the frames are level and stable without any wobbling, as this is the core skeleton for the floor panels.
Step 5: Fit the "top panels". Insert the anti-static floor panels into the square grids formed by the beams, pressing gently until they are flush and level. After installation, tap with a rubber mallet to check for stability and eliminate any looseness. At this point, the entire anti-static floor system is successfully installed.